Storage and Filesystems
Disk Layout
Disk layout involves organizing a disk into partitions, which can then be assigned to different directories to segregate data and manage storage efficiently. The disk is identified by a device name, typically formatted as:
/dev/device-name
When setting up disk partitions, it's important to consider the system type, which can be either BIOS or UEFI.
BIOS
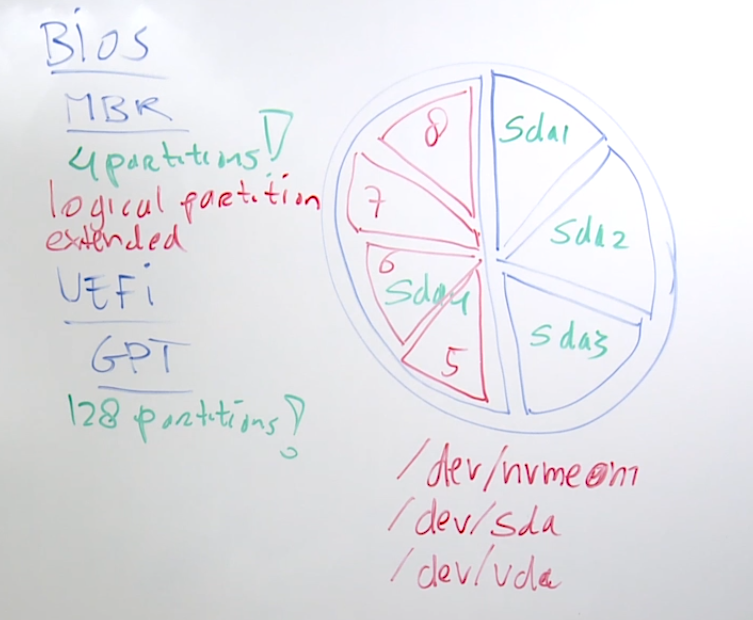
BIOS (Basic Input/Output System) is an older firmware interface that initializes and tests hardware during the booting process. It uses the MBR (Master Boot Record) partitioning scheme, which has several limitations.
- Limited to 4 primary partitions.
- Only has 64 bytes to store partition information.
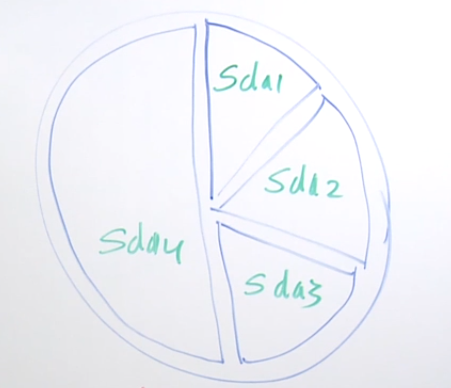
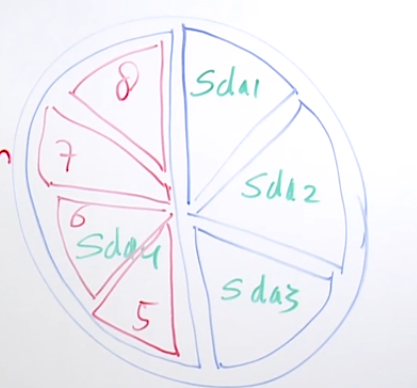
- Because there's only 4 partitions, logical partitions are invented.
- Logical partitions are created in the extended partition.
- Cannot handle disks larger than 2TB.
Diagram:
UEFI
UEFI (Unified Extensible Firmware Interface) is a modern firmware interface designed to replace BIOS. It uses the GPT (GUID Partition Table) partitioning scheme, which offers several advantages over MBR.
- Supports up to 128 partitions.
- Provides better support for large drives and modern hardware.
- Includes a secure boot feature to ensure that only trusted software is loaded at boot time.
- Faster boot times and more advanced graphical interfaces during startup.
Diagram:
Listing Block Devices
The lsblk command lists block devices, displaying their names, sizes, and mount points. This helps in understanding the current disk layout and identifying available devices.
$ lsblk
NAME    MAJ:MIN RM SIZE RO TYPE MOUNTPOINT
xvda    202:0    0  50G  0 disk
├─xvda1 202:1    0   1M  0 part
└─xvda2 202:2    0  50G  0 part /
xvdb    202:16   0   5G  0 disk
xvdc    202:32   0  25G  0 disk
└─xvdc1 202:33   0  25G  0 part
Accessing Devices
Devices are accessible in the /dev/ directory. This is where all the device files are located, allowing interaction with hardware components.
$ ll /dev/xvd*
brw-rw----. 1 root disk 202,  0 Dec 23 22:27 /dev/xvda
brw-rw----. 1 root disk 202,  1 Dec 23 22:27 /dev/xvda1
brw-rw----. 1 root disk 202,  2 Dec 23 22:27 /dev/xvda2
brw-rw----. 1 root disk 202, 16 Dec 23 22:27 /dev/xvdb
brw-rw----. 1 root disk 202, 32 Dec 23 22:27 /dev/xvdc
brw-rw----. 1 root disk 202, 33 Dec 23 22:27 /dev/xvdc1
From the kernel's perspective, block devices can also be viewed in /proc/partitions. This file shows a list of partitions recognized by the kernel.
$ ll /proc/partitions
-r--r--r--. 1 root root 0 Dec 23 22:27 /proc/partitions

$ cat /proc/partitions
major minor  #blocks  name

 202        0   52428800 xvda
 202        1       1024 xvda1
 202        2   52426735 xvda2
 202       16    5242880 xvdb
 202       32   26214400 xvdc
 202       33   26213376 xvdc1
Storage Options
There are several storage options available, including partitions, LVM (Logical Volume Manager), Stratis, and VDO (Virtual Data Optimizer). Each option offers different features and benefits, depending on the use case.
-
Partitions
- Classical solution which can be used in all cases.
- It can be utilized to allocate dedicated storage to specific types of data.
-
LVM (Logical Volume Manager)
- Used at default installation of RHEL.
- Supports resizing volumes and adding new disks without downtime.
- Adds flexibility to storage (resize, snapshots, and more).
-
Stratis
- Offers features like snapshots and data integrity checking.
- Next generation volume management filesystem that uses thin provisioning by default.
- Creates a unified storage pool, and is implemented in user space, making API access possible.
-
VDO (Virtual Data Optimizer)
- Focused on storing files in the most efficient way.
- Provides block-level deduplication, compression, and thin provisioning.
GPT vs. MBR
Comparing GPT and MBR partitioning schemes, GPT is the modern choice offering better features and flexibility, while MBR is the older, more limited option.
-
MBR
- Limited to disks up to 2TB.
- Supports only 4 primary partitions (extendable with logical partitions).
- 512 bytes to store boot information, 64 bytes to store partitions.
- Does not include redundancy.
-
GPT
- Supports larger disks (up to 9.4 ZB).
- Allows for more partitions (up to 128 max).
- Includes redundancy with a backup partition table.
File Systems
Different file systems are optimized for various use cases, such as general-purpose storage or high-performance applications. Creating a file system is similar to formatting partitions in other operating systems. The process prepares a partition to store data.
To create an XFS Filesystem:
mkfs.xfs
To create an EXT4 Filesystem:
mkfs.ext4
If no filesystem is specified, it will create an Ext2 file system.
mkfs
Use mount to mount it in runtime and umount before disconnecting device.
EXT4 Filesystem
EXT4 is widely used for its reliability and performance. It's suitable for most general-purpose storage needs and is known for its journaling feature, which helps in preventing data corruption.
When to Use EXT4:
- Default in RHEL 6, and is still used.
- Backward compatible with EXT2 and EXT3.
- Uses Journal to guarantee data integrity.
- Size can be increased and decreased.
- Prevents data corruption by tracking uncommitted changes.
- Supported by most Linux distributions, ensuring broad compatibility.
Some limitations:
- Single-threaded I/O
- Limited resources:
- Less than 1000 IOPS
- Less than 200MB/s bandwidth
- Limited CPU availability
XFS Filesystem
XFS is designed for high-performance and large-scale data management. It's particularly effective for large storage servers due to its scalability and efficiency in handling large files.
- Default filesystem, uses CoW to guarantee data integrity.
- Optimized for environments with heavy I/O operations.
- Supports extremely large files and file systems.
- Size can be increased, but not decreased.
- Uses extent-based allocation to reduce fragmentation.
- Allocates inodes dynamically for better disk space utilization.
The xfsdump utility can be used for creating backups of XFS formatted devices and considers specific XFS attributes.
xfsdumponly works on a complete XFS device.xfsdumpcan make full backups or different levels of incremental backups.
Commands:
-
To create a full backup of the contents of the
/datadirectory:xfsdump -1 0 -f /backupfiles/data.xfsdump /data -
To restore a backup that was made with xfsdump:
xfsrestore -f /backupfiles/data.xfsdump /data -
To manually repair broken XFS file systems:
xfsrepair