Create the Virtual Networks
Updated Sep 15, 2023 ·
Overview
In VirtualBox, you will need to create the networks that will be used by the nodes.
| VirtualBox Network Type | Network Name | Purpose / Network Type | CIDR / Address | DHCP |
|---|---|---|---|---|
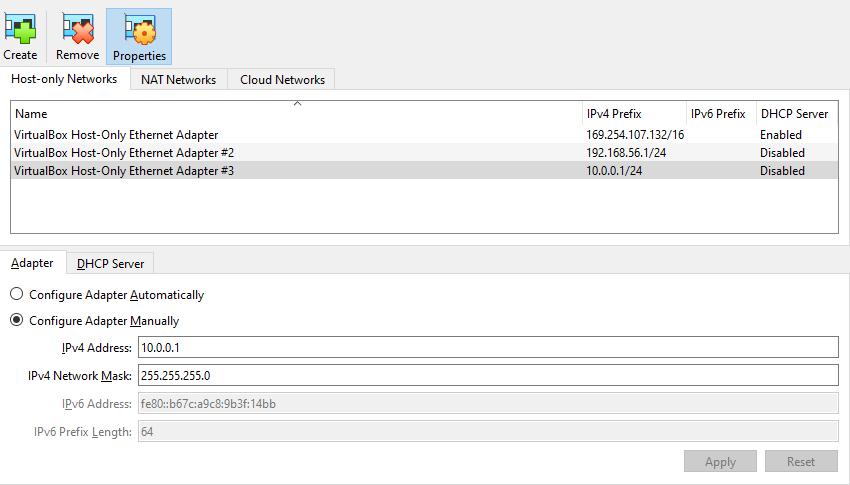
| Host-Only Adapter | ManagementNetwork | Management (Controller ↔ Nodes) | 10.0.0.0/24 | Disabled |
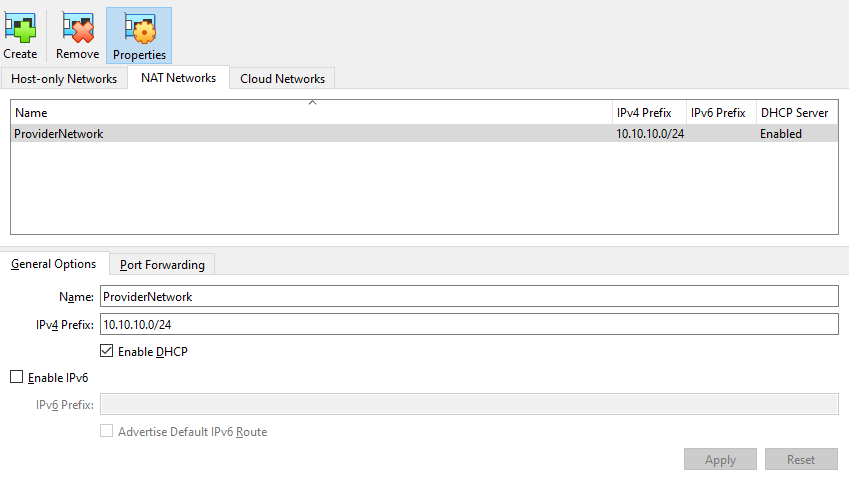
| NAT Network | ProviderNetwork | Provider / VM traffic | 10.10.10.0/24 | Disabled (manual IPs optional) |
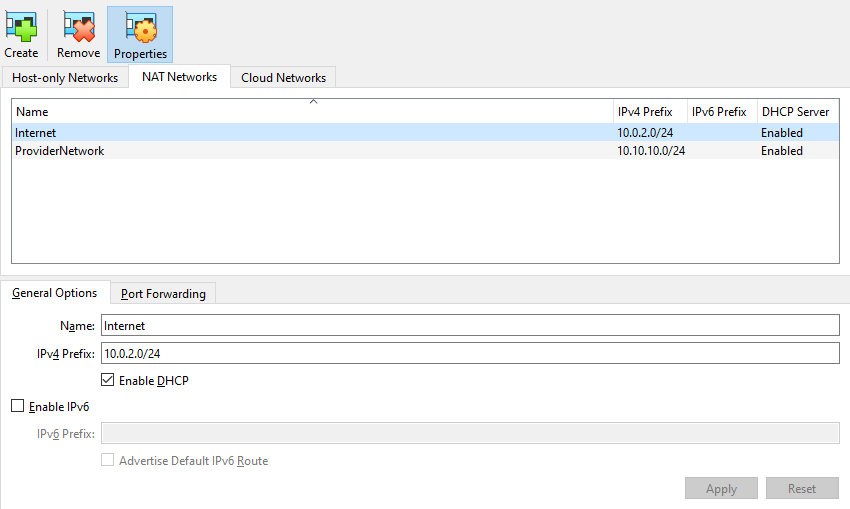
| NAT Network | Internet | Internet access / Updates | 10.0.2.0/24 | Enabled |
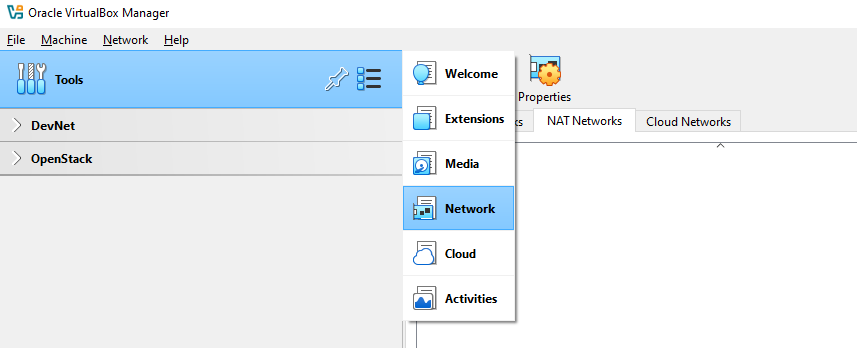
To create the networks, go to Tools ➔ Network ➔ NAT Network.
Host-Only Adapter (Management Network)
Note: You cannot rename Host-Only adapters in VirtualBox on Windows. VirtualBox does not allow renaming in the GUI, because it links directly to a network interface in Windows.
-
Click
+to create a new host-only adapter. -
Select the adapter ➔ click Edit:
- IPv4 Address:
10.0.0.1 - IPv4 Network Mask:
255.255.255.0 - DHCP: Disabled (we’ll assign static IPs for the VMs)
- IPv4 Address:
-
Click Apply to save.
NAT Network (Provider Network)
-
Click
+to create a new NAT network. -
Click the Edit (gear icon) and update based on the table above.
-
Click Apply to save.
NAT Network (Internet)
-
Click
+to create a new NAT network. -
Click the Edit (gear icon) and update based on the table above.
-
Click Apply to save.
Next Steps
Next, create the virtual machines and configure the VM settings.
See Create the VMs.