Create a Log Analytics Workspace
Overview
In this lab, we'll set up a Log Analytics Workspace to centralize logs and improve visibility across Azure resources.
Create the Log Analytics Workspace
-
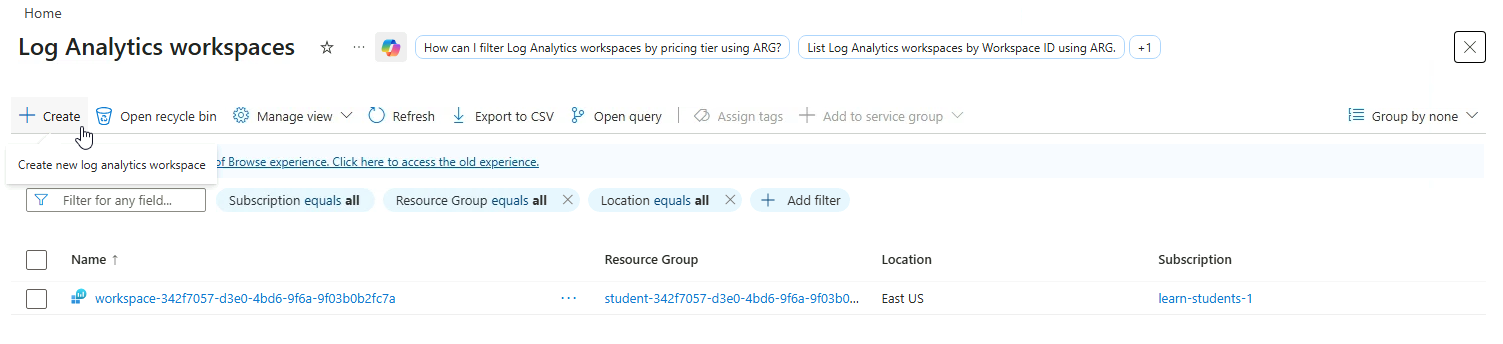
Go to Log Analytics workspaces in the Azure Portal
Click Create
-
Provide a unique workspace name and set the Region to
East US.Click Review + create then Create.
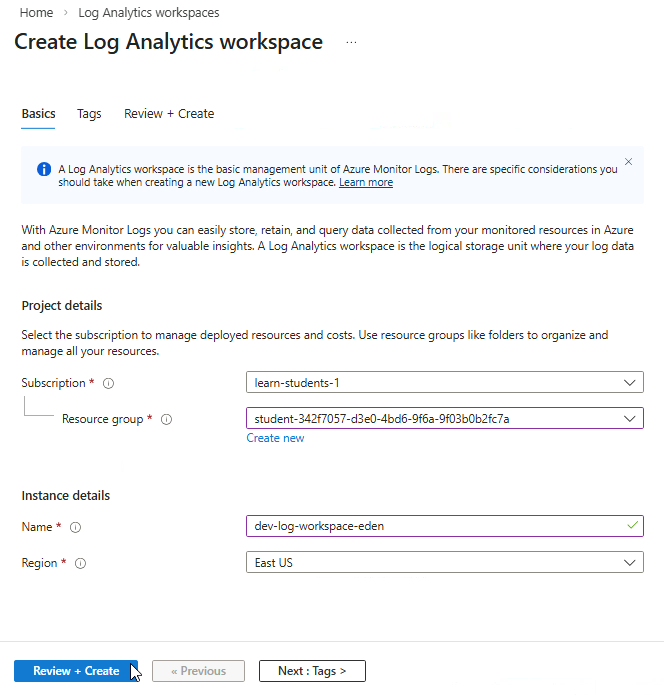
This creates the workspace where all logs will be stored and analyzed.
Connect Function App to Workspace
Connect your Function App to the Log Analytics workspace to start collecting logs.
Note: I've created a Function app prior to this lab. You can follow the steps in Lab: Create Application Insights.
-
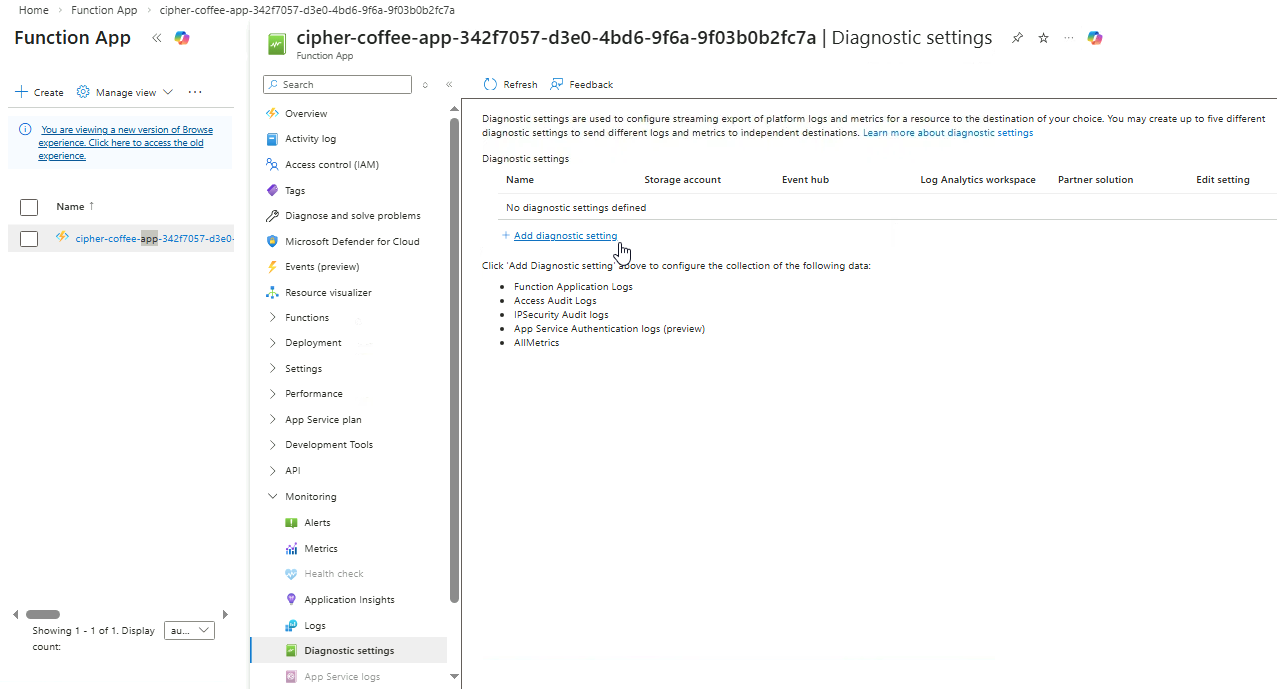
Navigate to your Function App and go to Monitoring ➔ Diagnostic settings
Click Add diagnostic setting.
-
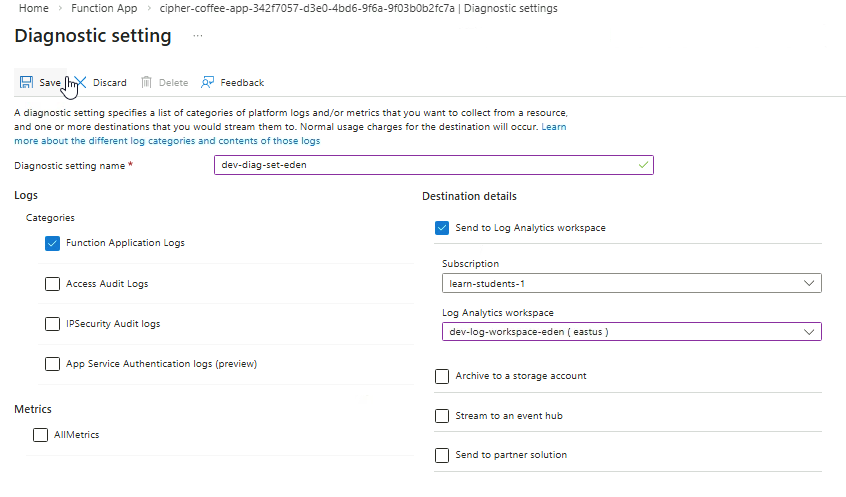
Provide a name for the setting and fill in the details.
Under Logs:
- Select Function Application Logs
- Select Send to Log Analytics workspace
- Choose your newly created workspace.
Once you're done, click Save.
-
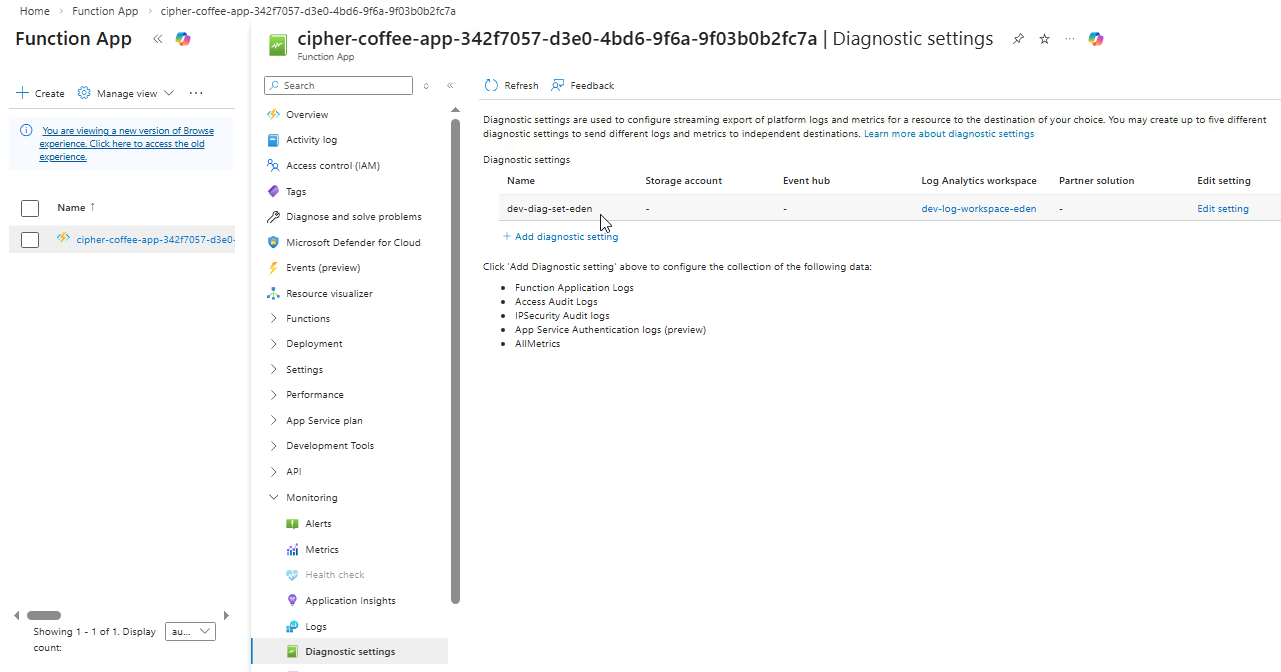
Go back to the Diagnostic Settings view and confirm the new settings.
Note: Wait for a 3-5 minutes before proceeding to the next step.
Verify Data Collection
Navigate back to Log Analytics workspaces and open your workspace.
Go to Logs and verify the connections.
Note: It may take several minutes for FunctionAppLogs data to appear after configuring diagnostic settings.